
Why is my ironing board dripping?
Find where water starts before changing the cover. Check condensation, worn padding, steam use and the difference between a wet deck and a leaking iron.
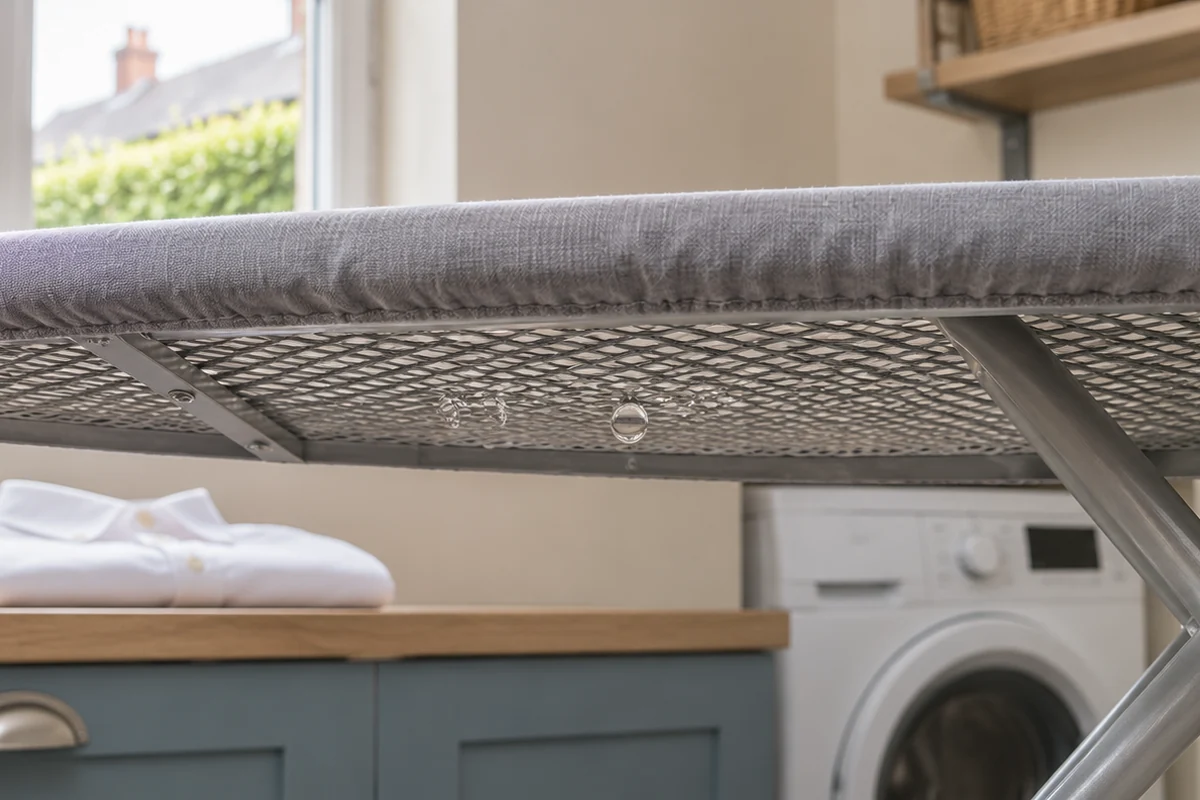
Locate the water before changing the cover
Switch the iron off, unplug it and let it cool before investigating. Deal with water on the floor and keep the electrical lead and socket clear. Move the appliance to its approved resting place when it is safe to do so. Check the board, cover and iron separately so you can identify where the water started.
Water forming beneath the deck after steam ironing can be condensation. Water visibly coming from the iron’s holes, tank, hose or separate base needs the appliance’s own troubleshooting instructions. Note whether the dripping followed a refill, cleaning cycle or long period of steaming. That detail helps you choose the right check.
Philips identifies both worn cover padding and normal steam condensation as possible causes of a wet board. Tefal also describes steam condensing on a board and calls for suitable board ventilation and cover construction. Philips wet-board guidance · Tefal board and cover guidance.
Match the wet area to the next check
Scroll sideways to compare the water location and the next check.
| Where you notice water | What to inspect once cool | Next step |
|---|---|---|
| Under a steam-soaked deck | Wet padding, cover condition and deck ventilation | Check the cover system and permitted steam setting |
| On the garment directly beneath the iron | Whether water came from the soleplate | Follow the exact iron’s dripping or spitting guidance |
| Beside the tank or generator base | Tank seating, cap or drain area as the maker directs | Use the appliance’s leak procedure before ironing again |
| After fitting a new cover | Correct fit, padding layers and instructions | Restore the maker’s intended layer arrangement |
Inspect the padding and the deck while dry
Let the board cool and remove the cover as instructed. Look for padding that has flattened, split or developed thin spots. Check whether it was fitted smoothly and whether extra old layers have been left underneath. A top layer, separate underlay and complete cover set can require different arrangements. Photograph the label and the order of the layers before taking them apart.
Inspect the deck for damage and check the manufacturer’s cleaning and drying instructions. Keep ventilation openings in the arrangement the maker intended. Avoid adding a household towel, waterproof sheet or loose material to catch the water beneath the cover. Each layer can change the cover’s tension and the way moisture moves through the board.
Look at the new cover’s stated board size and permitted equipment. A cover that stretches across the deck still needs to be suitable for the way you use steam. If the iron produces more steam than the current setup can handle, compare approved cover systems before assuming the whole board needs replacing.
Choose a compatible replacement when the layers are worn
For a Brabantia Board B with a 124 × 38 cm deck, the PerfectFlow Bubbles 101106 is a complete layered cover system. It has its own padding arrangement. Use it on the stated board size and follow its fitting instructions rather than stacking extra pads beneath it.
Brabantia Board B PerfectFlow Bubbles Cover 101106
Brabantia pairs a cotton top with a textured textile layer and a coated layer designed to manage moisture. The set fits the 124 × 38 cm Board B deck.
Good for
A Board B used with a steam iron or a safely supported compatible steam generator.
Bear in mind
Fit the supplied layers as directed without adding an extra pad. Use the board’s separate holder specifications to check appliance support.
- 124 × 38 cm
- Three-layer design
- Complete cover
This is an option after checking the board fit and finding that the cover system needs attention. It cannot repair a leaking iron or a damaged board frame. Read the Board B replacement cover guide if you are deciding between a top cloth and a complete replacement.
When a board is designed for separate underlay and the cover still fits, an appropriate replacement pad can address worn cushioning. The Brabantia felt 196423 is supplied as 135 × 49 cm with 8 mm thickness, for trimming as directed to a compatible board.
Brabantia Felt Ironing Board Underlay 196423
Brabantia lists an 8 mm polyester felt underlay that you cut to fit the deck. Use it with a compatible top cover and suitable board.
Good for
A worn separate pad beneath a sound top cover, where the board and cover instructions allow separate padding.
Bear in mind
This is the underlay. It needs a suitable top cover. Trim to the deck and check the fit before securing the cover.
- 8 mm felt
- Trim to fit
- Underlay only
Confirm that separate felt is allowed with the cover you have. Keep it flat and check the new layer does not distort the edge fastening. The cover replacement guide explains how to identify the layer you are replacing and smooth it before tensioning the top.
Review how steam is being used
Check the iron’s instructions for steam control, fabric settings and pauses. Use the steam the garment requires. Philips suggests reducing steam, including an Eco setting where available, when condensation develops during a long session. If the label permits pressing without steam, use the appliance’s dry mode as directed for that part of the job.
Lift and rearrange fabric instead of repeatedly soaking the same patch. If the cover is already saturated, stop and let the setup dry. More steam can make it harder to see whether the original problem was a worn pad or simply an accumulation during the session.
If water comes directly from the soleplate, follow the iron spitting and marking guide alongside the model manual. Avoid changing the appliance’s water type, cleaning solution or temperature settings by guesswork to solve a board problem.
Let the board dry before putting it away
After ironing, switch off and follow the appliance’s cooling instructions. Leave the board and cover open to dry in a suitable location, then fold them as the maker directs. A damp cover packed into a tight cupboard is harder to inspect before the next session.
If dripping returns quickly with a sound, correctly fitted cover and permitted steam use, ask the board or appliance maker to check the setup. Give the exact model references and describe the location and timing of the water. Include whether it starts at the iron, collects within the padding or appears beneath the deck.
Manufacturer references
Frequently asked questions
Why is there water under my ironing board?
Steam can condense in the cover and beneath the deck, particularly during a long session or with worn padding. First check whether the water starts at the board or comes from the iron, tank, hose or base.
Should I replace the whole ironing board when it drips?
Check the source of the water, the cover system and the deck condition first. Worn compatible cover layers may be replaceable. A leak from the iron needs the appliance’s own checks.
Can I add felt beneath any ironing board cover?
Check the board and cover instructions. Some systems allow separate padding, while a complete layered cover supplies its own arrangement. Added thickness must leave the cover secure and the deck working as intended.
Will lowering the steam setting help with condensation?
Use the setting the garment and appliance permit. Philips suggests reducing steam or using Eco where available to limit condensation. Let a saturated cover dry before continuing.
Can I fold the board away while the cover is damp?
Follow the board maker’s instructions for cooling and drying before storage. Check the damp layers and let them dry in a suitable location instead of packing them tightly into a cupboard.